|
Rat Crafts To Make
GENERAL CRAFT IDEAS
Look for patterns for stuffed rats in thrift shops; look for ideas in rat catalogs and magazines; give new life to an old toy, take an old stuffed rat and make it into a puppet; draw a rat head for a wood or fabric hobby horse, make it rat shaped, use and old broom or a wooden dowel for the stick; use rat print fabric to make handy tote bags in just the sizes you need. Make several in different prints for all your shopping and toting needs; buy rat print fabric when it is on sale for that craft item you do not know you are even making yet; don't throw away the pattern and instructions to the needle point or other crafts so that you can reuse them or share them with a friend; buy glass paint and paint rats and rat heads on old plain cups and saucers; make earrings out of those single rat charms you have, the earrings do not have to be identical; Make a necklace out of that favorite rat earring you lost the match to; take an inexpensive clock apart and add a rat photo over the face, put it back together and add a battery to make it work; make a rat print fabric book cover for your paperbacks
Please send in your rattie crafts, things you make for your ratties or things you make with rattie themes for yourself. Send instructions and if you could take a photo of your items, we would love that too. Thanks!!
The contents of this page for Rat Crafts To Make is a work in progress.
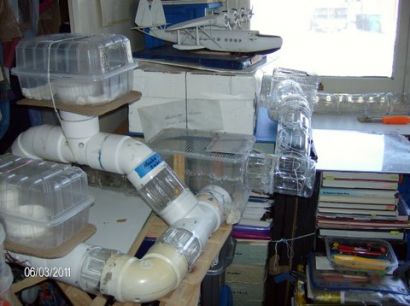
PLEASE NOTE THAT THERE IS A PAGE IN THE NAVIGATION MENU TO A HOW TO MAKE RATTIE MAZES AND JOSEPHINE'S RATTIE TUBE PLAYGROUND. HAVE A LOOK YOU WILL LOVE THE IDEAS
.gif)
PIPE CLEANER RATTIE HARNESS
Sent to us from Michaela with step by step photos (don't you just love it!)
Pipe Cleaner Harness
Adjustable harness for small or medium rats.
Start with a Pipe Cleaner color of your choice
.gif)
1. Make a small loop at one end about 1 cm across and twist the base.
.gif)
2. Bend loose end around and thread it through the small loop.
.gif)
3. Pull end through until the large loop is the size of your rat’s head.
.gif)
4. Bend the end around again until it is about the size of their waist.
.gif)
5. Insert end in through small loop about 1 cm to make a “tab”.
.gif)
6. Bend “tab” back on itself to form a “clasp”.
.gif)
To put the harness on your rat, undo clasp and pull tab out. Loosen neck loop and slip it over rat’s head, tighten a tiny bit to keep it from coming off. Twist waist loop around under rat, insert tab and make clasp, twist if necessary.
.gif)
(If you have a large rat, you can add another Pipe Cleaner before step 4. Make small loop one end, take another Pipe Cleaner of the same color and insert the end into the loop and make another small loop around it. Twist both loops together and follow next steps, trim tab appropriately.)
CROCHETING OPEN TUNNELS AND CLOSED TUNNELS FOR RATTIES
Marna Kazmaier
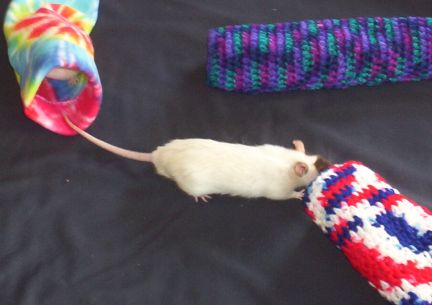 Here is a fun rat craft. I used an approx 3 1/2" opening when I made my tunnels. I crocheted the tunnels in a circle, but you could crochet a flat piece and then stitch the edge together. Here is a fun rat craft. I used an approx 3 1/2" opening when I made my tunnels. I crocheted the tunnels in a circle, but you could crochet a flat piece and then stitch the edge together.
When I crocheted I used a G hook for the Open Tunnel with a worsted
medium weight yarn...I like veragated colored. On the Closed Tunnel I
used an H hook and did a 1/2 stitch for the first few inches and a
double stitch for the rear so that it would lay closed. I did the
tighter stitches in front and on the Open Tunnel to give it some body to
stand up. As far as length that would be what ever you wanted. I like to train with a shorter tunnel, but later when setting up the course, I
like a longer tunnel. When you set up for a demo (to show folks) it
looks more impressive if the rattie "disappears" into the tunnel then
comes/pops back out, when it runs the course.
When finished I set up the three tunnels for the ratties to see for the
first time....they were so cute, running to and through them. They went
to the fleece one first. LaRue ran right into it straight away. After
that, without prior training they did follow my finger to go where I put
my hand and pointed. I was very pleased with that. LOL Like I said,
no other training before. I think bonding with the animals first,
before training to/on a/ table work helps because they want to be
with/by/on you. Now I have to find the rest of my equipment and get
started. I guess I should add that I do train while bonding...just not
table work.
**If you like these items but do not crochet, or do not have time to crochet <grin> I do have some for sale on our Rat Item For Sale page and also a couple to win in our Rattie Photo Contests. (May not be up right now, but coming soon).
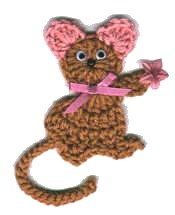
RATTIE REFRIGERATOR MAGNET OR PIN
 Materials Materials
Small amount of worsted weight Gray or Light Brown Yarn
Small amount of worsted weight Pink Yarn
Crochet Hook Size F (or smaller for pin)
2 miniature eyes
1/2 yd tiny ribbon
1 small black bead for the nose
a bit of school glue
cute tiny flower
Embroidery needle
Head: with Gray or Light Brown Yarn
Rnd 1) Ch 4; (12 dc, 3 hdc) in 4th chain from hook; join with a slip st in 4th chain of beg. ch 4: 16 sts. Do not end off.
Body: with Gray or Light Brown Yarn
Row 1) Ch 3, 5 dc, 4 hdc in same st; ch 1, turn work. Do not end off: 10 stitches
Arm: with Gray or Light Brown Yarn
Row 1) Sc in same st, sc in next st; ch 1, turn work: 2 sc.
Row 2) Repeat Row 1.
Row 3) Decrease over last 2 sts. Decrease: (Insert hook in next st, pull up a loop) twice, yo, draw through last 3 loops on hook to complete the decrease. Fasten off, secure ends.
Body: with Gray or Light Brown Yarn
Row 1) Right side facing, attach yarn to 1st dc on Row 1 of Body (top of ch 3); Ch 3, 2 dc in same st, dc in next 5 sts, hdc in next st; ch 3, turn work, leaving last un-worked st on Row 1 of Body un-worked.
Row 2) Dc in next 5 sts, decrease over last 3 sts. Decrease: [yo, insert hook in next st, draw up a loop, (yo, draw through 2 loops) once] 3 times, yo, draw through last 4 loops on hook to complete the decrease. Do not end off.
Tail: with Gray or Light Brown Yarn
Ch 20, slip st in 2nd ch from hook and in each chain across, slip st in last st on Body of Mouse. Do not end off.
Feet: with Gray or Light Brown Yarn
Row 1) Slip st in next st, (sc, dc, sc) in same st, slip st in next 4 sts, (sc, ch 2, dc) in same st. Fasten off, secure ends.
Ears: with Pink Yarn
First Ear:
Skip next 3 sts on Head from where arm is worked, right side facing, attach yarn to next st, (2 hdc, 2 dc, 2 hdc) in next st, sl st in next st. Fasten off, secure ends.
Second Ear: with Pink Yarn
Skip next st from where last Ear was worked on Head, right side facing, attach yarn to next st, (2 hdc, 2 dc, 2 hdc) in next st, slip st in next st. Fasten off, secure ends.
Finishing:
Glue eyes on face and small bead to center of face for nose. Tie ribbon into a tiny bow, cut off extra ribbon tail and glue around the neck. Glue a flower to hand. Attach magnet or pin to back or crocheted rattie with glue.
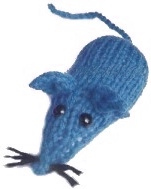
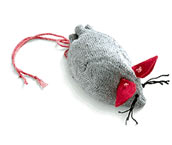
KNITTED RATTIE TOY
 5.50mm (size 5) Knitting needles 5.50mm (size 5) Knitting needles
8 ply wool in chosen color
Toy Filling
Option Dried Catnip for cats
Beads for eyes
Size 12 cms in size.
Tension- 16sts and 22 rows to 10 cms over stst with yarn double.
Use double Yarn
Body
Cast on 18 sts
Work 14 rows stst
Shaping Body
Row 1
k2, (k2tog,k4) twice. K2tog,k2 (15sts)
Rows 2,4,6,8,10,12
Purl Rows
Row 3
k2, (k2tog,k3) twice,k2tog,k1 (12sts)
Row 5
(k3,k2tog)
twice,k2 (10sts)
Row 7
k3,k2tog,k2,k2tog,k1 (8 sts)
Row 9
(k1,k2tog) twice, k2 (3sts)
Row 11
(k2tog) 3 times (3sts)
Row 13
k3tog
Fasten Off
Ears - make 2
cast on 5 sts
work 3 rows stst
Row 4
P2tog, P1,P2tog
Row 5
Sl 1, k2tog, pass slip stitch over
Fasten off
Tail
Twist two 10cm's lengths of wool together
Make up
Join side seams of mouse body and fill firmly adding the optional catnip if it is for your pet.
Thread some wool around the cast on edge and draw up and knot in the tail. Secure with a few stitches.
Ears
Stitch the first and last cast on sts together on ears and sew onto the mouse.
Use black thread to sew on bead eyes and for the nose add some lengths for whiskers
BABY OR CHILD'S SOCK RATTIE
 Materials Materials
Baby or Child's Sock (might find at Garage Sale)
A Bit of Scrap Felt
Plastic cut out of used, cleaned Milk Jug
A Little Yarn
Embroidery needle
Black Embroidery Thread
Stuffing
Using scissors, cut off the toe section of the child's sock at the heel.
Cut two rattie ear shapes from the felt scraps, and cut a teardrop shape from the milk jug plastic.
Insert the plastic teardrop into the sock, it serves to hold the rat's shape.
Fill the sock with the stuffing.
Turn back the sock's edge.
With 14" of yarn threaded through the needle, lay a running stitch around the opening, as shown. Draw the yarn tight to close the opening.
Tie off the yarn, leaving the extra for the tail.
Sew on the felt ears, and make whiskers with embroidery floss .
RATTIE TUBE PINATA
This craft is so easy and fun the kids will use more toilet paper just to get the roll to craft a toy and treat holder for their ratties.
Take a empty toilet, paper towel or holiday paper roll and cut a piece about 4-5" long. Fold one of the sides into the tube so that the end is now closed. Add a few treats and some seeds to the tube. Fold in the other side.
You can give it to the ratties just like this or you can decorate the outside with tissue paper, cut or cut and lightly wadded and glued on with children's glue.
Some people have taped the ends shut. If you fold the ends into the tube from two sides they will stay long enough for the ratties to have a great time opening them.
Leave the empty tube in the rat cage the rats will love to play with it and carry it into their beds and sleep with it long after the treats are gone.
Ideas for treats. Yoggie treats, yogurt covered raisins, crasins, nuts, seeds, human cereal pieces, little pieces of breads or even small pieces of human cookies.....try different food or treat items each time...keep your ratties guessing.
Photo coming!!
FANCY RAT HOUSE OR CALL IT A RATTIE HIDE-A-WAY
This is another fun and easy craft for children and adults alike.
Ratties love hide boxes. You can use any type of non waxy household boxes for this craft. Ideas would be, empty cereal boxes, instant potato box, toaster pastry boxes (not the waxy type), Kleenex, happy meal box, empty cracker box, you got the idea now. 
You can decorate the box as you would any pinata. Take strips of tissue paper and lightly wad up balls of paper and glue to the box. Using the tissue wads you can make your box look like a stained window, a house, or whatever your heart desires.
Use a child safe glue. I would *not* recommend a glue gun. I use "school glue" for my pinata boxes.
You could also decorate the box with construction paper. You can use the construction paper to make the box look like a castle, a house, an igloo, a tent, a store, a window, or whatever you can think of that your ratties would be cute in.
I add bedding "stuff" to the decorated boxes just before I give them to the ratties. When I say stuff I am taking about toilet paper, kleenex, cuts of fabric, an old clean sock.....
Fancy rats Just love these boxes. Don't be insulted if they add a bit of their own ideas to take off any decor you put on....see it as a compliment.
Photos coming soon!!
| 


 In the high plains of South Dakota, USA